Showing posts with label If it's ugly...... Show all posts

1/30/2014

If money were no object!!

Our old worn sectional couch had to go and I looked at thrift store and on Craigslist for something to replace it...  But everything now is so huge and overstuffed and totally inappropriate for our old house....  So I finally settled on a used sofa with a Victorian look for the end of the room... Now there was nothing for the dogs to sit on to look out the window and this would never do. 

Of course something like this old chaise would be perfect except for the price..
 

Then I ran across a "Victorian sitting bench"....arms on both ends and no back..... perfect except for the price.


So when I ran across this I knew I could make a Victorian sitting bench that would be perfect for the dogs and  off I went to the barn to find 2 old wooden folding chairs that had been destined to be returned to the thrift store from whence they came years ago....


Stay tuned..... to see these chairs transformed for Morris and Molly to watch the birds again.....


7/22/2013

I am drowning in lemonade....

I really need a tattoo that says "when life gives me lemons, I make lemonade."

No one believes me how bad this house was when we moved in 33 years ago until I show  them the pantry... I had left the upper part "as was" to remind myself occasionally how far I've come.

The bedrooms were all papered like the first shot with a border going to the ceiling.  Some walls were a pressed board which had been painted with enamel and sealed with duct tape which had also been painted.

I myself  had added the shelves to the pantry and they were made from used and mismatched, salvaged wood.. So after the plumber mess was cleaned up and   repaired I decided to paint the whole damn thing black...black black... like they do ceilings in commercial buildings to hide pipes and heating ducts..

As it turns out  I love it.  It is so pretty now with all the jars and cans on the shelves.  And what did I do about the duct tape...?   I painted it black of course..  Now I have to come up with a clever (cheap) solution for the wallpapered section...stay tuned!!

And then there's the bathroom solution.... I went to the garden department and found this amazing sprinkler...  The red thing on the handle adjusts the flow and the head has NINE settings....including mist... Just like a 5 star hotel.  I bought a lovely white hose used for campers and when I want to take a shower I can just run the hose to the bathroom sink.

I think I am going to have to paint the black clamp a coordinating color... Whatta ya think??


I found an adapter for the sink faucet which allows a hose to be connected when I need to shower...  Works great.


Now I need to find a clever (cheap) solution to the hole in the tiled wall...  Maybe filling it with plastic greenery... any suggestions? Not anything using duct tape, please!


4/09/2013

My Passion for Paisley (Persian Pickles)


 I have a passion for paisleys.  I love them in fabric design and I love stitching them with threads, beads, embroidery and sequins. Paisleys have been a very traditional element in crazy quilts from the very beginning.  They rank right up there with fans and spider webs as popular motifs...  
When I decided to paint the commode chair I knew I wanted to have a paisley cushion and paisley elements in the painted decoration... I have to admit that my experience with buying fabric online has been abysmal, both in quality and color.. But my choices at our two local fabric stores were nil so I was forced to go to internet sites.  First I tried major fabric sites and then I resorted to Google images... The problem with Google images is even though you are offered a huge selection to look at, not all of them are for sale...And that is what happened with my very first and most favorite paisley fabric. I was looking for a paisley that had ALL the rainbow colors I have in my door kit... But this fabric was sold on Etsy last summer and not available anywhere I searched.  If you have this fabric in your stash...let me know as I just love it and I need very little.  I will keep searching for it...it is a Waverly fabric.

So I settled for this fabric...but I found  it on several fabric sites and the colors on the screen varied widely...from very bright and colorful to kinda dull...so we'll see when it arrives..  I do like the whimsical rustic look of the paisleys.


I also ordered this and then I would only use part of my paints which I guess is okay... It is a beautiful paisley though and if I don't use it on the chair I will use it for a bag, Just because the door is rainbow doesn't mean the chair has to be...


  Paisley or Paisley pattern is a term in English for a design using the boteh, a droplet-shaped vegetable motif of Persian or Indian  origin. Such designs became very popular in the West in the 18th and 19th centuries, following imports from British India and were then imitated locally. The pattern is sometimes called "Persian pickles" by American traditionalists, especially quilt-makers, or "Welsh pears" in Welsh textiles as far back as 1888. Its western name derives from the town of Paisley, in central Scotland, a center for textiles where paisley designs were produced
  

4/03/2013

Unique Chair with Storage Chamber LOLOLOLOLOL!!!!!

About 20 years ago I ran across this chair and had to buy it and it has been in the barn ever since.  It is solid oak and if you haven't guessed the porcelain "chamber" served a special purpose... I've tried to sell it at a couple barn sales to no avail.. So I am going to paint it when I'm doing the door. I know I will have ample paint so I was searching around for something to do at the same time and THIS chair is definitely it...

The finish needs sanding but the chair itself is absolutely solid and has lovely lines.

I envision a new life for this chair looking something like this..  If  I put casters on it and a soft cushion I could use it as a computer chair.  As old as this chair is, it is amazing the chamber pot is not only still with it, but not a single chip in it...

Of course this post falls under "If it's ugly, paint it"

A really inspirational site for embellished furniture is http://pinterest.com/dotfisk/embellished-furniture-one/


Also in the running for a repaint was my reproduction sewing basket.  Mine is like this but on legs.... I wanted to take a picture of mine but can't find my camera today...


It opens up similar to this..  I bought it because I could add CQ to the top instead the the tapestry already there.  I have worked myself into a frenzy looking for that camera.  I took pictures at class on Saturday and know I packed it with my stuff..  I've searched through everything several times, searched the car and even called the thread store.

But the day started out having to repair the vacuum and has gone downhill  from there.  The only way to salvage the day now is a nice nap and cuddle with Morris....

3/23/2013

They arrived and take a look!

There are ten 8oz containers of paints for Behr... Not only were they a GREAT bargain, there was FREE SHIPPING.... They came with color swatches for the paints I ordered but also swatches for coordinated colors in case I wanted a darker, lighter or brighter version...  (see the 3 blues on the right)

There are 10 colors and after looking at them all I'm happy with my choices but think I need to add one more.. a darker purple to balance the deep  poppy red...

11 colors and fancy trims....what fun!!!


Now I have the actual colors the next step will be doing the door to scale and playing with color placement with my chosen colors...  I know I also want some stenciling on the door and some birds...  I will do several versions and let you give some input...

I know I have lots of bits and pieces of fancy trims stash in the barn  left from other projects... some only  12" but hope to find places for everything I have.   After I inventory what I have a trip to Windsor Hardware and Trim will be my last stop...The hardest part will be waiting until June when it is warm enough to remove the door and DH is out of town..  Some of the trim around the door I can do in the barn ahead of that time.......

 Yesterday I found the empty granola bin sitting right in front of my coffee pot... I suppose this to be one of my DH's subtle hints.  I didn't get it done but I did bake him a berry pie... Today starts the second of my Level One classes at the thread store...

9/11/2010

How I did my storage cabinet..

Someone asked how I did the storage cabinet I have by my work table in the living room... I had found this drawer unit reasonably priced but it looked like it belonged in a dental office. Since I had finished a small chest in antique Chinese red for my bedroom, I decided to try my hand doing something similar in black to the big white thing...
I started by painting it with a high-gloss black and hoped to end up with a facsimile to the Asian chest on the left.... A little paint, stenciling, and more painting........
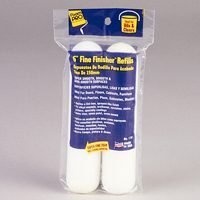
I did ALL the painting BEFORE I assembled the cabinet (much easier). First I used rustoleum gloss paint and put it on the cabinet pieces with a fine-finish roller ... a 6" dense foam that lays down a very smooth coat and is available at any hardware store.
I did the gold line with an Elmer's paint pen and the corner deco with a stamp and gold stamp pad (Michaels craft store.)Then using some old stencils and ordinary craft acrylic paint I put on the flowers.I wasn't even especially careful with the stenciling as I was going for an aged look in the end. The long stencil was too wide so I just used bits and pieces at a time. I sprayed the drawers with high gloss black paint and then sponged them with gold Folk Art paint from Michaels. It required no "artistic" talent using the stencils....just time and patience. This would have been sooooooooooooooo much easier if I could have done it in the summer when I could have laid everything out on a tarp and sprayed it..... It still looks much nicer than the big white box in my living room....
I had started off with different cheap units from box stores that were just junk and when I had some birthday money I splurged on a cabinet from here http://www.chandlercreations.com/site/1406927/page/629006 They have a great sale every so often and they also have free shipping... Now you even can get some models in black...

8/27/2010

My work area is completely moveable...

I live in a small house and a room for sewing or crafting is just not an option so I work in the living/dining area and EVERYTHING is on wheels... I've shown this work area before which I use for crazy quilting and if we entertain or need the space, it all rolls into the laundry room.. It occupies a space of about 4x4'. The main star of this setup is the used hospital/home-care bedside table which I love... I increased the size of the table top by adding a larger piece of wood...and I'm thinking I might have to enlarge that just a bit... It's always full but I know if I had a 10' table, it would always be full also.. More space-more clutter. I used another one of these tables for my sewing machine and today I set up another one..

Before when I painted buttons I had paints and buttons covering our only eating area for days at a time. So since I am going to be painting lots of buttons to sell I set up this bedside table I found recently at a thrift store...


First I screwed 3 trays to the back to hold bottles of paint... I have lots of bottles of paints but I just pull what I need for the project I'm working on.
Then I screwed a measuring cup from my large laundry soap container to the table... Then another of the same measuring cup nests right into it and there is no spilled water.

This is one of the nicer tables and has a drawer which holds brushes, sanding block, whisk broom and pens.. I can just wheel it out when I want to paint and wheel it all back when finished and always be ready to go...
Since the buttons are only 1" in diameter, the work table is perfect for painting the buttons for my Etsy shop.. ...One nice thing about these tables is that, if necessary, I can raise them high enough to work comfortably standing up...

The tables could be prettier so maybe one of these days I will paint them ....watch for them to show up in my "If it's Ugly" section ...maybe this winter... Here's how I did the cabinet...

9/09/2009

Finally the railing is out of the bushes......

Sometimes I have projects or visions that literally take years to come to fruition. This is one of them... I had salvaged this piece of rusty, damaged. decorative iron railing 7 or 8 years ago and wanted to put it on this little porch.. The only problem was that the steps on the porch were in the middle and I didn't want to cut the iron railing.. The old stairs were rotting and building new ones was more that I wanted to tackle.

So as soon as my handyman finished the chicken house, I had him make new steps.. On the other side I added some old decorative wooden slats that only heaven knows where I salvaged them. I also have another iron piece to add above that but that will have to wait til spring...I also have some old cedar shakes and shutters that I want to use out here somehow. Now I can start looking for some funky old furniture to recycle....

I am sooo happy to finally have my little railing up... This little porch faces southeast and not used in the summer because it is too hot... But in the spring and fall it's perfect not only for catching the warmth of the morning sun but because it's sheltered from prevailing winds...

8/31/2009

The other side of the door!!!


Remember a while back when I told you about our ugly odd-sized door with 30 coats of paint on it? Rather then have a door specially made or reframe for a standard door I chose to paint and antique it. When someone asked where the "facilities" are, we just tell them to look for a green door.

Well obviously the other side was just as ugly so I painted it also with a different scene... Not only to disguise the ugly door but to give someone something to look at in the tiny bathroom... We have a couple friends well over 6' and I wonder "Do they have to put their feet in the tub when sitting on the toilet?" Anyway a long time ago I promised to put up a picture of the other side of the door so here it is.

5/25/2009

I can handle quirky and eccentric!


All fall and winter I was on a one-woman crusade to convince my husband to sell the farm and move into town. ... to no avail.... He is NO handy man and I am tired of the work and upkeep... BUT as everything is in spring bloom I've decided what better place to fall over dead...

The picture on the right was an old tack shed that I recycled into a gazebo years and years ago... I've used stained glass (some antique and some I made) throughout the garden because I love to see the sun rise or set through it... The garden proper (not the forest) was close to 2 acres and each year I've let more and more go wild.... quack grass heaven....

I have a lot of "garden art" throughout the garden which I seldom see anymore and have decided this summer I'm moving it ALL up close to the house... It will be like those cluttered quirky gardens you sometimes see with hundreds of gnomes... I have no gnomes but plenty of other stuff and I'm old enough that I can handle eccentric and quirky....

4/08/2009

If it's ugly - phones


Someone emailed me the picture of the red phone... Had no idea where it came from... If anyone knows please tell me... Not only do I want to give them credit, anyone who would do this has to be my newest very best friend. I LOVE IT!!!!... Now the other old phone is on my desk. It's the only phone that works when the power is out. It was originally black and years ago I gold leafed it. The gold is dull and worn and it's now outright ugly. Guess what's on my to-do list now!!!

3/20/2009

Sunflower Bench

When is a bench not a bench? When it is 3 chairs. This "bench" is actually 3 chairs held together with pipe clamps. Again the chairs were thrift store finds and classic "70s" complete with ugly plastic upholstered seats and back inserts which were trashed and replaced with boards I painted.... I do not leave this outside. It is in a workroom in the barn and on occasions such as a garden party it is pulled out. If I had a house with a large entry it would be perfect.... Right now it is piled high with fabric. (This photo was taken by friend and garden photographer, Charles Mann and was in BH&G 3/2003)

3/18/2009

Madison's bench (Repeat Post)


This is a repeat post but appropriate for spring... I used to haunt farm auction for cheap used lumber to build benches so this post falls under recycle, paint it if it's ugly, and painted furniture.. Enjoy

Years ago I had an on-site rose nursery. After one season I discovered people bought plants, walked around the garden and left. But if I had benches they bought plants, walked around the garden, rested on a bench and ..."bought more plants" So I started building benches during the winter months...all from recycled lumber and odd bits.


I made this bench for my princess
granddaughter, Madison, for a summer visit from Alaska... The "jewels" were odd bits of stained glass.This bench was by far the most popular with customers as a photo opt. It easily sat two people and there must be hundreds of photos floating around my area of gardeners seated on this bench holding a hoe or rake as a royal staff. I devised a plan using NO nails and just a recipitcating saw, lag screws, and a socket wrench that would allow anyone at any skill level to build a bench.


3/13/2009

If it's ugly..the other side of the door.


It stands to reason that if one side of the door is ugly the other is also....so of course I had to paint the other side. This bathroom was built in the forties and very tiny...and ugly. So the door is a diversionary tactic!!!!

Wait until you see what I did to the ugly kitchen.......

3/06/2009

If It's Ugly.......green door


Since I'll be out sitting with sheep most of the day I'm doing a quickie post. One of my guiding principles of life is "if it's ugly, paint it." My house is 107 years old, poorly built and entirely ugly...The door to the bathroom had about 30 layers of paint on it and was just a plain door... and really ugly. Sanding it down was out of the question and it was an odd size and would have had a door made to fit it or the opening redone to fit a pre-hung door unit. Soooooooo
I used a crackle medium and painted it green and antiqued it to make it "ugly with character" Then I put moulding around a rectangle in the center and painted a scene. It's now a landmark in the house as I can send anyone needing the bathroom to search for the green door...
Then I had to paint a different scene on the other side....

12/09/2008

What I used on cabinet


I was asked what I used on the CQ Cabinet. I did ALL the painting BEFORE I assembed the cabinet (much easier). First I used rustoleum gloss paint and put it on the cabinet pieces with a fine-finish roller ... a 6" dense foam that lays down a very smooth coat and is available at any hardware store. I did the gold line with an Elmer's paint pen and the corner deco with a stamp and gold stamp pad (Michaels craft store.)

Then using some old stencils and ordinary craft acrllyic paint I put on the flowers.I was not even especially careful with the stenciling as I was going for an aged look in the end. The long stencil was too wide so I just used bits and pieces at a time. I sprayed the drawers with high gloss black paint and then sponged them with gold Folk Art paint from Michaels.

Since it is winter and the humidity is so high, I am using the cabinet now but in the spring I will roll it out on a warm day and give it a coat of antique glaze and spray it several times with a high gloss clear glaze for a lacquered effect. It required no "artistic" talent using the stencils....just time and patience.

12/03/2008

My new CQ cabinet!!


Well it's about done. I have a little touch up to do with black and gold and a piece of gold molding to over the middle seam... This would have been sooooooooooooooo much easier if I could have done it in the summer when I could have laid everything out on a tarp and sprayed it..... All would have been easier if I had read ALL of the directions first but it will look much nicer than the big white box in my living room....
Related Posts Plugin for WordPress, Blogger...

Popular Posts