Showing posts with label book making. Show all posts

9/12/2018

Another lost project rescued!!!

 
When I started the beaded bird project I had a vision of them being mounted on thin pieces of wood and assembled accordion style so they could all be seen at once.  Now I am rethinking this plan and will try to combine the beaded bird with another project.


 In 2010 I joined CQI round robin with a specific outcome in mind.... It was a wonderful group of stitchers and included: Cathy Labath - USA, Helina Pettinen - Finland, Jeanne Gagnaux - France,  Meg Shaffer - USA, and Ritva Peltola - Finland...  I had signed up for a seams-only round robin because I had planned to  incorporate them into a jacket made from this pattern.
At that time I bought a gorgeous olive-green brocade fabric at a thrift store for the jacket.  Eight years later the fabric is still hanging in my work room and the round robin blocks are waiting in a basket on a shelf.
When I put the beaded birds on the blocks on the brocade it was a match made it heaven


3/05/2017

Progress and dreaded glue gun...

 Well I have all the pages hand sewn to the spine which was an relative easy job because I had the sew lines well marked with stitching. Now I will cover this side of the spine with black felt. and then add the covers.         The 1/4" spacing I chose was about right but I could have added a tad more even.
 
The cover are done except for the final touches... "Glue gunning" was a skill I hadn't ever mastered and it has been about 20 years since I used one.. But I had to have a few damaged brain cells when I thought could see well enough to sew with black thread on black ribbon to bind the pages...

I used a glue gun (rather badly) to apply both the ribbon binding and the trim\ The glue came out in lines too thin or to heavy so I need practice for sure on my trigger control.


In the process I managed to burn about every finger, glue the glue gun to the stand, glue the glue gun to the table and even glue a block to the table.  I ended up with bits of unwanted glue several places. I'm hoping I will improve with practice..  With all the improvements to technology over the years I thought maybe someone had invented a better glue gun....NOT!!

So I went to Google to see if there were helpful tips and there were many sites... Most all cautioned not to touch the hot glue gun which I think is quite obvious and the rest of the tips were about as helpful... like: "If sitting down while working, make sure you wear long pants to avoid burns from any stray drips of hot glue. "

 However there were a few that were new to me.
1.Vaseline on the tip of the glue gun to prevent little glue hairs.
2. Try rubbing alcohol to remove unwanted glue which I will definitely need to try.
3. Store your glue sticks in a spot with low humidity to prevent glue hairs.
4.  Use a hair dryer to soften unwanted glue spots.

When I posted about my Valentine Dinner I forgot to add photo of my all time favorite dessert... Lemon Sponge Tart..  I thought the recipe was on the site but I couldn't find it so I will type it to share... Particularly great recipe if you need a mostly gluten-free dessert. If a lemon lover like me you NEED this recipe.

8/30/2016

Cottages Finally Finished.... CQJP 2014

 When I started this cottage theme in 2014 I originally intended to finish it as one book..

But after the thrill of the suffrage quilt being accepted in Houston I began thinking I may finish it as one piece (See possibility at left) so the project sat on the shelf until last winter.  But after waffling back and forth I knew I book/books would be best as I wanted to leave them to granddaughters.  It was pure vanity wanting to enter them in a competition and I knew I would be sorry down the road. 


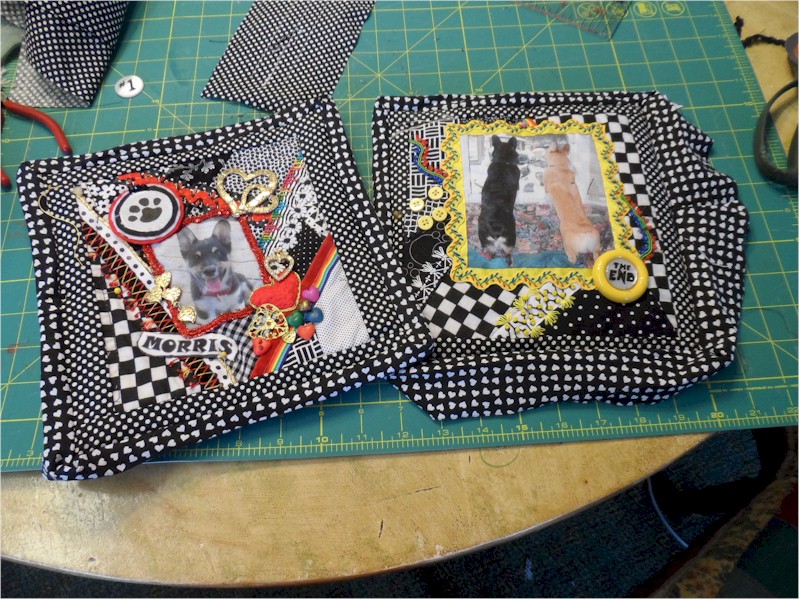
The Morris book was 16 blocks counting the covers  and I did them back to back so there were 8 pages.  All the pages were facing each other and they were so heavily embellished that it didn't work  well.  I knew that this time I wanted each page to be backed so the embellishments on the cottage blocks would have some protection.


So that meant that there would be 14 pages including covers...which would be too thick and unwieldy.   The Morris book is over 2 inches thick with just 8 pages.

This meant 2 books instead of 1 which is fine as there will be one for each of the oldest granddaughters.  I had already finished the CQJP 2015 into 2 books for the youngest granddaughters.
So right away I had to start another lace cottage for the second cover.  It was much less complex than the first one but I liked it just as well.


Once that was done I started the blocks that would back each cottage page.  I did different adages about home on each page and kept them quite simple.

I was really happy with the way they turned out.  They not only protected the embellished pages, they added to the whole cottage theme.


Then began the long process of binding each page and edging each page.  In one book each page was edged differently with lace and trims and in the other they were edged with all lace.  The adage pages and the finishing of the cottage pages took months.

I knew for absolute  certainty  that when assembled I wanted the pages to open flat and began looking at alternative ways to assemble them.  I have done several books finished with buttons holding the pages together but they do not open flat.

The Morris book is assembled in "signatures" with a spine and it opens fairly flat but I wanted to explore other methods.


To the left the top example is called a "French-Stitch" method based on a traditional book-binding technique.  The reference showed doing it with cording but I chose to use multiple ribbons. 

The second technique was using beads and ribbons.  I will add some more rows when I find more beads the right size that a ribbon needle will pass through. If you look closely at the photo above you can see the ribbons and beads when the books are flat...  I am really happy with the results of both methods.

The "French-Stitch" method was a bit complicated and I learned too late that it is important to hold the piece facing the same direction when you start the next row..  My error is not that noticeable but I will know better next time.  This method has a lot of possibilities combining  various cordings with beads.


And I finished each book with some pictures of myself and a little bio about the importance of needlework throughout my life.  I bought a good-sized lot of knitted lace on e-bay last winter for this project and used most of it... I love the look of it.


This is the  book I used for information and inspiration and I never found anything better.  I can highly recommend it.

 This was my last really large project and could quit now and rest on my laurels (whatever my laurels are....) but I'm going to really try to complete as many of the CQJP 2016 as I can  and assemble the anniversary hanky piece which is 90% done.
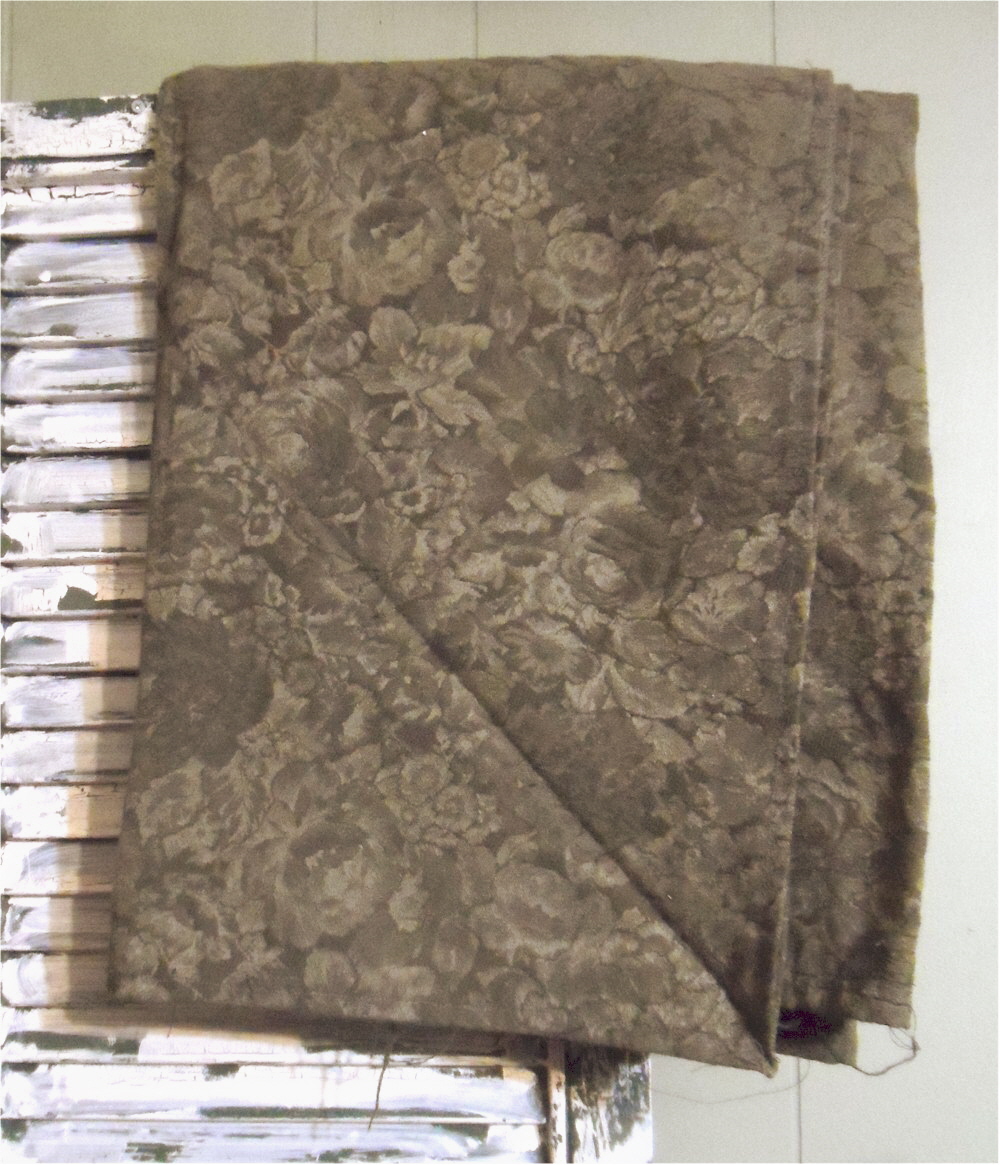

12/16/2015

Adding an extra allowance to your block...

There is one step that I do on EVERY block whether I'm working on it or if it's for an RR --Leave an ample seam allowance. Having an extra allowance is especially necessary if you are going to make a book of your blocks.  This extra allowance allows for grommets or buttons to hold your book together.
But other reasons for extra seam allowance are:

 We mostly use fabrics that fray and that edge is the most vulnerable point.

If there is NOT ample allowance outside the exact size of the block, you are continually having to handle the edges which can easily get soiled as well as frayed..

I advise at least 1-2" allowance larger than the block because I often want to use a hoop.  If you skimp on this allowance I guarantee it will eventually cause you grief.  Having an extra allowance is especially necessary if you are going to make a book of your blocks.  Again this extra allowance allows for grommets or buttons to hold your book together.

Step 1 Cutting the pieces for the block. 

First piecing blocks is my least favorite chore.  I have tried every method and for me paper piecing the fastest and least stressful.   I use the same pattern (see note at the end) on all of them and once you embellish it is isn't even noticeable. Since I use the same pattern over and over I made templates with 1/4" allowance. 

But if I want extra allowance it is easy to add it on the patches with an outer edge.  But I would tend to  forget which were the outer edges so I marked them in red and add an extra inch on that side.

The blocks for CQJP2016 are now all pieced and are about 9 " for a finished 6 1/2" block.  They are ready to be attached to a foundation..  For a block foundation I LOVE old well-washed sheets.


Step 2: Preparing the block for embellishing. 

 Once pieced  I pin a block to the foundation. Then I do a long stitch on the machine to hold it in place.  If I had a machine which did zigzag I'd probably do that. 


I use  home-made templates to mark my basting lines on the BACK of the block.  I started cutting these squares out of old matt boards years ago and I now have every size from 6" to 12" in 1/2" increments. They make this part easier and I can recommend adding them to your list of tools.  They come in handy for other tasks also...  I use them over and over.


On the BACK of the block I trace the exact size of the finished block and inside that I trace the square that is 1/2" size smaller so I have a line 1/4" inside my outside limit of the block.. 

Without an inner line marked I see people beading right up to the edge of the actual block size...which means you will have to remove beads to finish off the block. I use two different colors and run a basting line along each line. 


When you turn it over this is what you see.


 Note:  For years and years I used a block pattern #8 from Sharon Boggon and now I am using #28 as it has a couple more patches.  These are patterns from her fabulous 2001 "I dropped a button box" quilt.  I used to find them on one page and will have to look for it.  But just type "I dropped a button box" block pattern in google and they come up all over pinterest.

12/19/2012

Fabric Book/Journal Tutorial

First I need to clarify definitions:
One BLOCK = the 6" CQJP square as I finished it...
One PAGE  = two (2) blocks back-to-back.
One SECTION = two pages sewn together..

I ended the Crazy Quilt Journal Project 2012 with 16 blocks... I wasn't as careful as I should have been and there was considerable size difference between the largest and smallest blocks...  Rather than cut them all down to the size of the smallest block (which was certainly a viable option) I chose to add a border to all the blocks and then trim them to  common size...


I then cut a light piece of felt to the common size of the blocks ... A piece of lightweight cotton batting would have worked just as well.  I wanted this filler between the blocks to give the page some body... no limp pages for me....  At the same time I cut two pieces of heavy interfacing for the covers...  They need to cut about 1/2" larger on the outside edges....not on the side facing the spine of the book.


Then I sewed a strip of 2 1/2" binding around each page (2 blocks back-to-back) by machine...  I made the binding out of material to coordinate with the blocks... I highly recommend making a BIAS binding.... it is much more pliable and forgiving than binding cut on grain. There are numerous sites (and even videos) which show how to do this but I really liked this site... http://cynthiashaffer.typepad.com/blog/2011/05/turning-a-corner-making-a-point-binding-tutorial.html.  She did a much better job of explaining this step than I every could.

And then I neatly turned the binding to the back, pressed it, and sewed it by hand..


When all the pages were bound I sewed two pages together to make a SECTION!


Then I cut the spine a little wider than I thought I would need from the same heavy duty interfacing.  I marked lines about 1/2" apart... I cover one side with coordinating fabric by using double sided interfacing...


 I then sewed down the lines with a bobbin thread that would show easily on the fabric.


Then by hand, I sewed each section to a line....in order of course..


When open you can see that the sections are about 1/2" apart on the spine but because the pages are so thick that is necessary for the book to open properly and lay flat.


At this point (without covers) you can see how it looks...  There are 3 SECTIONS of two PAGES each.   So there are 12 blocks for the inside to the book,

I trimmed the spine to just leave enough seam allowance to add the covers and covered it with a piece of felt...  I then assembled the covers exactly like I did the pages except I added both the felt and the interfacing.


I then sewed the covers to the spine by hand.  This was the hardest part due to the thickness of the layers...  So I used a very long sturdy needle, extra heavy thread and a pair of pliers to make the task go easier..

Then I covered the black felt on the spine with the dog paw ribbon using again double sided interfacing.


Done....  I struggle with writing tutorials as it is easier to do something than write directions on how to do it... I strive it to make the process easily understood.  If there is any point that needs more clarification, please write me and I will update it....


12/14/2012

Look...a book!..well almost.....

Today has been the most wonderful day since I tried to rearrange my face with an immovable object.  It's snowing, I'm home, I've been almost pain free all day,  I've some foot-stompin, honky-tonk country music on Pandora, and I've been working on my Morris book for about 5 hours... mostly at the sewing machine...

If you look closely as you pass my chair while I'm on my sewing machine, you will see a little fat, black butt sticking out from under the chair... He dozes with his nose right next to my foot.  My dog loves me!!!!!


Of course the first problem I ran into is that the 16 blocks weren't all exactly the same size...  In fact there was a considerable difference from the largest to the smallest..  The obvious and easiest solution was to cut all of them down to the size of the smallest block... BUT I liked the larger size so I trimmed out all the  blocks (on the left) and then cut them all to the same size.


Heaven knows I didn't want limp pages so each page is lined with a piece of light weight felt...  The front and back covers have the felt plus a piece of very heavy fusible interfacing. You all know how great hindsight is ..right?  Well I get to this stage and realize that I want the cover pages larger...  I could have planned for this in the beginning but didn't.... but I'll remember when I make my next book...


You can see I trimmed the covers out with the tiny polka dots and I'm preparing to sew  on the bias binding.  It will take me several days to get all the bias binding sewn by hand...


I hadn't shown you the inside of the back page...  It is a "pocket" page..  It will hold the laminated narratives for all the pages...


The blocks are back to back in groups of two pages.. twelve pages besides the covers. Since my book will be so thick I will need a spine and I marked it so I can evenly space the pages...  But I didn't want the interfacing showing on the inside of the book and it's impossible to mark the black  polka dots...  I stitched along the marked lines with white thread in the bobbin so I can see where to stitch the pages..


My garden is always full of critters and it supplies food for them throughout the winter... I walk to the window often to watch them... After a fresh snow like today I see little tracks everywhere.
And by the way this post is a milestone of sorts...it is #1200.
Related Posts Plugin for WordPress, Blogger...

Popular Posts