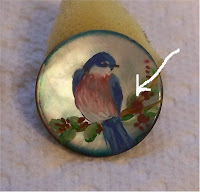
In this part I'm going to discuss paints and techniques and the last part I will demonstrate roses that ANYONE can do.....in fact a couple ways.... Ever wonder why almost all the buttons for sale have roses painted on them? It's because roses are the easiest thing to paint on buttons..
Step 1. Prepare the button which we have covered.
Step 2. Doing the "base coat" for roses or birds or cottages or whatever..... This is when your button will look the absolute worst and when most people want to quit... I forbid you to become discouraged at the base coat stage... everything is blotchy, flat and really looks ugly....but it is a critical stage. Also at this point it is often best to dab in some background color for foliage etc.
Thin your paints...I use just water and cheap paint. Work in layers and let dry between layers. The end product will look much better if you use three thin layers rather than one thick layer of paint... Also after the base coat I let the button dry several hours, even overnight... You are working on a hard non-absorbent surface.... If you work over paint that is not completely dry (even if it feels dry) it can sometimes lift right off the surface... So speaking from experience I take my time between steps...
Step 3. Doing the detail over the base coat... The nice thing about acrylics is they're very forgiving and mistakes can be painted right over. If you make a mistake it best not to try to rub it off....just let it dry... Then you can paint over it or gently scrape it off with the tip of a exacto knife.
The nice thing about working small is the lack of detail... so by using lots and lots of dots and general shapes you can fool about any one's eye.....
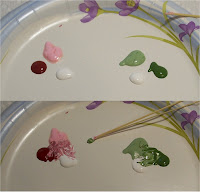
 Here is the way I mix paints to use on the buttons and I highly recommend this technique.. For example: In a triangle I put a dab of a light green, a dark green and white with some space in the center of the little triangle... Then I take a straw from my whisk broom and make a puddle of the three colors in the middle of the triangle...DO NOT MIX WELL... leave it streaky... so every time you dip your brush you get a slightly different mix and never the same mix so you have a very painterly look with little effort or color knowledge.... Cheating? maybe....
You can use your spotter or liner for the dots. If you just lay your spotter or angular shader on it's side you can get a nice leaf shape... If you lay it on it's side and pull, you get a nice comma shape. The liner is super for lines, stems and long commas or eyebrow shapes... When you are working with a liner I find it easier to pull the line toward me even if it means turning your button upside down...
If you are unfamiliar with brushes I recommend you take some time practicing with each brush...especially making dots... I make more dots than anything else in painting my buttons... You need to develop a VERY light touch to make tiny dots. This is not artistic talent ...just practice. Being able to make tiny dots is the key to success... So play with your brushes and make 100 tiny tiny dots..... I'll also cover in the next part the final finishing touches.. and we paint!!!!!


.jpg)

3 comments:
You are making a believer out of me!!
How's the breathing?
Do didn't mention how you are feeling. Better I hope.
The bird is right up my alley. I'm going to love trying birds. And I'm good at dots!!
Your buttons are really lovely.I love small things too- but doesn't making "small stuff" take ages!!
Post a Comment