Showing posts with label photography. Show all posts

11/12/2013

And more suffrage progress

I have only the buttons left to do on the "bottom left" block and will do them along with "side left" block. The trim flower in this motif was made with a pleated trim/ Rather than gather the trim I did in a spiral.

The seams are done on "side left" and I've started the beading... There is too much black on the right side and I'll remove two pieces of black lace.  The center black trim can be incorporated into the buttons. The suffragettes were often jailed for demonstrating  and if they went on a hunger strike, they were force fed.  Vote ladies... they did it for you!!! The black velvet bird upper left was a gift from Susan Elliott and I have something special to add to it..

My granddaughter Madison is a whiz with a camera and does the most beautiful panoramic skies.  I was wishing she were here this morning to help me capture the sunrise which was fabulous and turned the whole sky shades of pink.. But without her  this is the best I could do.

11/27/2011

Give the kit itself as a gift or...................

Give the kit itself as a gift or...................or finish it yourself as a gift.  Never a mislaid pincushion again with a tall Victorian-inspired pincushion which is both decorative and functional. The hardest part is done... The cushion itself is interlined, stuffed firmly and has a wooden insert inside to provide stability and making it easy to attach to a heavy candlestick or other base.

Each  kit is one-of-a-kind and  includes a cushion of fancy fabric just waiting to be bedecked with an exquisite reproduction brooch encrusted with rhinestones, trimmed with a luxurious chainette fringe, a length of special coordinated bead fringe, and  a length of gimp plus extra beads to make dangles....easily a $25-35 value if components purchased separately..  A lovely collection of fabric, beads and trims personally selected by me

.. Once assembled with any extra embellishments you may add, it becomes a one-of-a-kind elegant gift for a friend or loved one or just the kit itself makes an elegant and unusual gift. Unfortunately several in this photo have already sold and since they are one-of-a-kind will not be repeated...but I have more I will be adding occasionally.... 

Each kit contains:
• 1 cushion with wood insert for stability, tightly stuffed and ready to embellish.
• A generous yard of chainette fringe - enough to go around double for a luxurious look.
• 1 length of coordinating bead fringe.
• 1 length of coordinating gimp.
• 1 crocheted medallion for top of cushion
• 1 fancy vintage-inspired brooch.
• 1 bag of glass beads for dangles.. then let your imagination go wild and then add candlestick
 
Granddaughter Madi helped with the setup and photography... such a sweet heart...

3/14/2011

Mini tut....converting photos to sepia tones

I've accumulated several hundred pictures in my suffragette file.. and now it's time to get serious about printing them on fabric... First I need to do some editing and by far my favorite program for this procedure is Google's Picasa... If you do not have a good editing program or timid about trying software as complex as Photoshop, take my advice and try Picasa

I have and use Image Composer and Photoshop but I still LOVE Google's Picasa because
1. It's free
2. It is soooooooooooo user friendly
3. It is extremely versatile...
4. It is so quick and easy.


As you can see in just these few there is great variation in color in my collection of photos....and I wanted them ALL to be sepia (brown) tones since there will be so many of them on the quilt....
Picasa has an "effects" selection of choices and one of them is "sepia" so my first step was to apply that to all the photos I wanted to use...But even with all of them being sepia there was still more variation in tone than I wanted.
So the next step was to use the "saturation" selection.
Third down on the left....it is a choice I use on all photos, colored or not, which are to be printed on fabric... Color is always lost in that process so intensifying color in the beginning makes for a better end product. But in this case I'm using saturation to put many photos into balance. But as you can see the tools include sharpening, changing to B&W, tinting, adding a glow and soft focus among others... There are many other tools in the basic fixes and tuning sections.
On most of the effects tools there is this simple bar and button.. You can slide the button either way and watch the change in your photo as you use it and before you hit the apply button... VERY low tech here...
So using this simple technique you can see how I was able to make my photos very even in tone... Not only easily but quickly.


Just as a follow up note... To get the pictures of the Picasa tools I actually took a picture of the computer screen as it was something that was not downloadable... I do this quite often but the last time I posted about it I received such a negative response from one follower that I was hesitant to confess again... Hopefully that follower has moved on...if not I already know how you feel on this subject..!!!

11/19/2010

Editing Magic


I know I have mentioned this before but will add it again... I always talk about Photoshop and I do have an older version of photoshop but what I actually use all the time is called "Microsoft Image Composer" (MIC) It's like a kindergarten photoshop and hasn't been sold for years... I keep meaning to use my photoshop more so I get comfortable with it but it's easier and faster to use MIC because I am used to it........ But anything I do with MIC you can do better with photoshop....

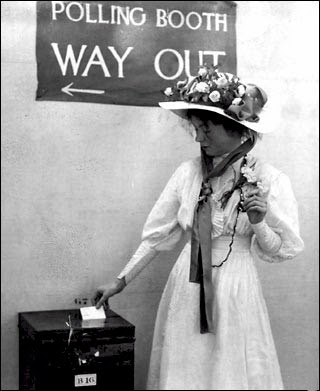
Remember in my last post I felt I was going to have a problem with the face on this girl because it was in the shadow of the hat and if I intensified the color to print on fabric it would really too dark? I wanted the face lighter but not the rest of the photo lighter....Well I performed a little editing magic..

I made an extra copy of the photo and edited out just the face. I then lightened it and pasted it on over the original.... You can see what a difference it made when you see the two photos side by side.... When I edit my son's pictures from his fishing lodge I have to do this little trick a lot because the fisherman are often wearing a hat with a big brim and their face is in deep shadow... and of course when they catch "the big one" they want everyone to see their big grin clearly... LOL


9/18/2010

Leslie's Block is Done - Fool's Gold.

I got to use lots of my Christmas gold cords, braids and beads and gold work techniques... It was fun and I definitely want to explore this some more after the first of the year. I'll also be checking the hobby stores for Christmas gold stuff on sale.... One of the best was the elastic cord sold for gift wrapping.. it was very supple and easy to couch... I tried several kinds of gold threads and liked Sulky the best...

Remember this as my inspiration... ? My flower was really too small but it is a great look using the red thread to couch the gold.... I will use it in the future...I used red Edmar threads to couch and will use something else next time... I just love it when I find something that I know will show up again and again in my work.....
Related Posts Plugin for WordPress, Blogger...

Popular Posts