 It's nice if you want to transfer an image and you can tape it to a window or light box and trace it...or if it is an iron-on image... And I know some stitchers put their images on plastic or tissue paper and stitch through it. Others put pinholes in the image and mark through the holes. I find these methods awkward at best.
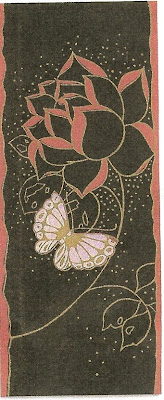
This is a rose image I wanted to transfer to very dark (almost black) fabric on Hideko's block. I could have use a transfer paper similar to carbon paper but it smears and disappears as you work. But if you are putting your image on dark fabric or like I often do, felt, there is a technique I use and call cutaway transfer...
I did not use a white or colored pencil of any sort.. I used a black 000 permanent marker (albeit very carefully) The black showed up very well on the dark fabric and was going to be stitched over anyway.. (I'm doing this on white paper because it shows up better.)
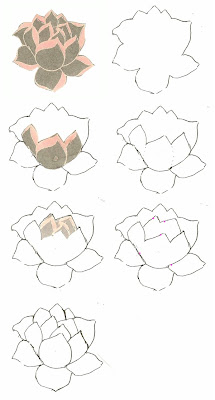
 Step one: Cut out the image and trace around it...
Step 2: Cut out the next biggest piece of the image and lay it in like a puzzle piece and trace around it.
Step 3: Again cut out the next biggest piece and put it in place and trace around it.
You end up with an image like the last one and it's easy to connect the few missing lines.. So in three easy tracing steps I easily replicated a rather intricate rose design.
It's not perfect but close enough once stitched. You can do this with most any image in 3-5 steps.
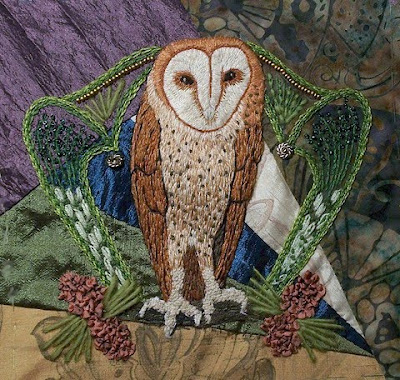
 I use this technique a LOT with all kinds of images... the most recent was the Art Nouveau background for this owl on dark fabric.. It was irregular and had to be symmetrical. I drew it on card stock, cut it out, traced it, and began cutting away sections and tracing until I had the design on the fabric. Again I used a black 000 pen. I use it with birds a lot to get the right positioning on wings etc. I love this technique and use it again and again... it's quick and quite accurate. (and a life saver for those who say they can't draw...)


.jpg)

4 comments:
thanks Gerry! I'm going to be using this technique in the future!
I've never done it this way Gerry. I'm going to have to give a try. Thanks for the tute..
Hmmm, kind of like cutting out pieces for applique. Never thought of that. I use the very cumbersome tissue paper method. I will have to try this next time. As always, thanks for the tips you put on your blog. - Cathy L
That's a great idea. The more methods of transferring a design we have, the easier it is to choose the right one for any particular project!
Post a Comment