I had some of that thin fusible stuff "heat and bond" and Susie brought something similar called Misty Fuse which she had just bought at a quilt show so we tried both... To protect my ironing board I put down a large piece of baking parchment paper which nothing sticks to and then the 16x16" foundation fabric.. On top of the foundation fabric I put a 16x16" piece of Misty Fuse and covered it all with more parchment paper and ironed... Once the parchment paper is peeled off the Misty Fuse is bonded to the foundation fabric but still has enough fusible surface to add more to it...
Then we laid the foundation (fusible side up ) and began cutting patches to put on it. We used chalk and a straight edge to mark the shape we wanted for a patch... It was easy to feel the patch underneath so we could put the ruler on the fabric for the next patch....mark with chalk and then cut it out with scissors and lay it in place until we had the foundation covered with patches which abutted against each other.. Since all the seams will be embellished there was a goodly margin for error...
If you look closely you can see the chalk marks on the corner patches as I just about have this side covered. I'm thinking at this point I need to make the large left tapestry piece smaller by making another patch... gold I think!! The chalk worked great as we could just brush it off.
Then we carefully moved the foundation covered with patches back to the ironing board....covered it with a sheet of parchment paper and ironed it slowly on the top side until the patches fused to the foundation and for good measure ironed on the back side also... Now we had a piece covered with patches and perfectly smooth and no bulky seam allowances to deal with.
At this point both Susie and I advise you to take it to your sewing machine and sew along the edges of the patches to make them really secure....
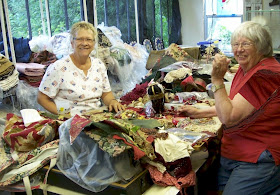
Of course also at this point it would have been an opportune time to stop and tidy up our work area but we were so excited with the way it was shaping up that we stopped for nothing. Occasionally DH came out to the barn to see if we were still alive and took pictures of us..
Now we could begin adding ribbon, gimp and lace to all the seams... BUT the next one I make I will use my sewing machine to cover all the seams with ribbons and then I can put gimp or trim on top of the ribbon and just sew by hand to the ribbon without going through all the layers of fabric. Doing the ribbon step would really only take a little extra time and I think the time would be worth it in the long run...
Since this is the side for the pocket I'm not putting a lot of trim in the middle.. The green line marks a very long seam covered with ribbon.. At the upper end I added trim on top of the ribbon and you can see how nice that looks.
This is Susie's pocket.. She chose to use the tapestry for the bag and do a crazy quilt pocket... We both used the same technique of abutting the patches to eliminate bulk.
After all the trim, ribbon, and laces were sewn on each section of the bag...you can see the back on the left... Then I ironed on a piece of Allie's fusible tricot as the last step before assembly. It was still soft enough to feel like a bag but the tricot was just the right thing to give it enough body. I love that stuff.
Next installment... Step 3 Assembly and other miscellaneous tips...


What? Stop to tidy up? In the middle of a project? I don't tidy up until I am ready to start the next project! I am glad you explained about using the fusible, with no seam allowances.
ReplyDeleteDeb
I'm with Deb on this one. I always tidy up after I finish a project. I'm really excited to read about your progress and ideas. Thank you.
ReplyDeleteRegrettably my English is too poor, but I understood all the same with photos, thank you!; It is a very good technique to have no different thicknesses. (Personally I place a flannelette behind my CQ)
ReplyDeleteKnow that DH came to see if you survived did well to me to laugh because I know this need to end at all costs;-)!
Well quilting